KB ID 0001312 Dtd 15/05/17
Problem
Following on from Part Two, now we have an offline Root CA, and a CRL server, our next step is defined by our PKI design, are we three tier, or two tier? (Look in Part One for a definition).
Solution
As previously mentioned, Microsoft just treats Intermediate CAs and Issuing CA's as the same thing (SubCAs). So the next step is identical for either. But I would suggest one difference, If I was deploying an Intermediate CA, I would have "LoadDefaultTemplates=0" in the CAPolicy.inf file, and for an Issuing server I would not, (that's just my personal preference).
I'm going to continue this piece for a two tier PKI deployment. And my next SubCA will be an Issuing CA.
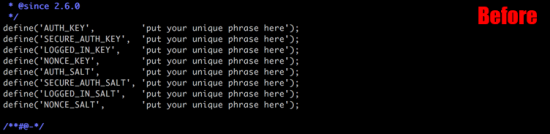
Create your SubCA CAPolicy.inf file and save it to C:\Windows
[Version]
Signature="$Windows NT$"
[PolicyStatementExtension]
Policies=InternalPolicy
[InternalPolicy]
OID= 1.2.3.4.1455.67.89.5
Notice="Legal Policy Statement"
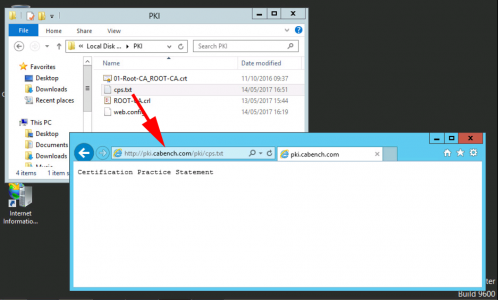
URL=http://pki.cabench.com/pki/cps.txt
[Certsrv_Server]
RenewalKeyLength=2048
RenewalValidityPeriod=Years
RenewalValidityPeriodUnits=15
CRLPeriod=weeks
CRLPeriodUnits=1
CRLDeltaPeriod=Days
CRLDeltaPeriodUnits=0
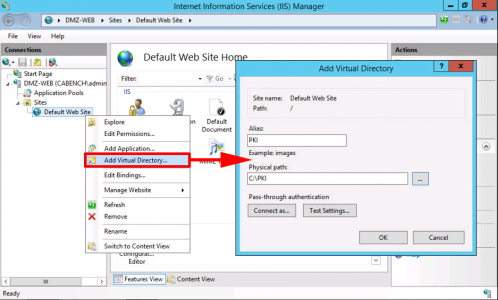
![CAPolicy File SubCA]()
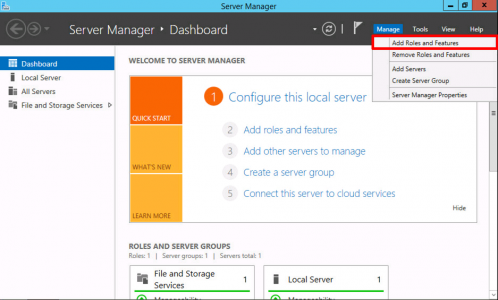
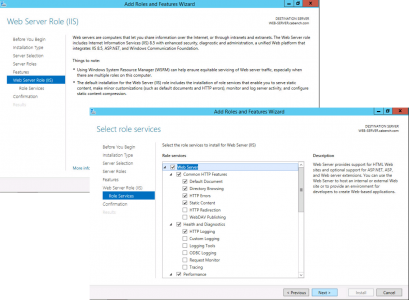
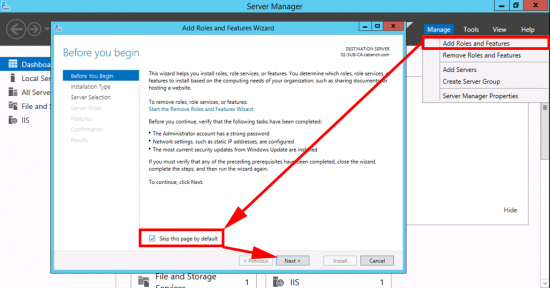
Launch Server Manager > Manage > Add Roles and Features.
![2012 Add Role]()
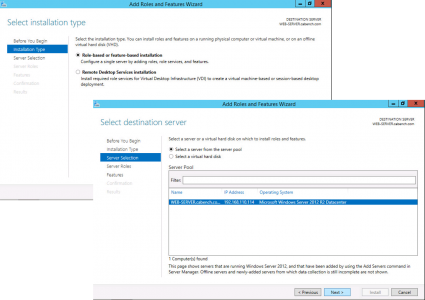
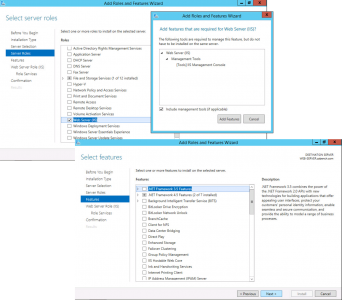
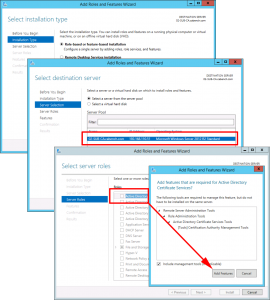
Role Based > Next > Select the Local Server >Next > Active Directory Certificate Services > Add Features > Next.
![2012 Add Certificate Services]()
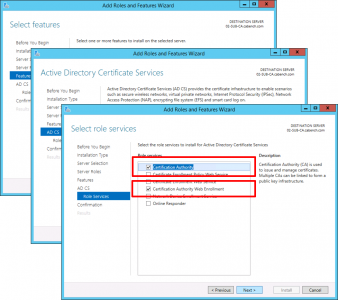
No additional Features are Needed > Next > Next > Select Certification Authority > Optional*: Select Certificate Authority Web Enrolment > Next.
*Note: This gives you the nice registration website for certificates.
![023-certification-authority-windows]()
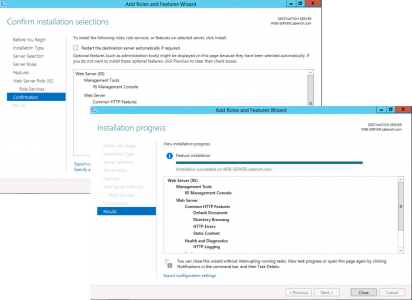
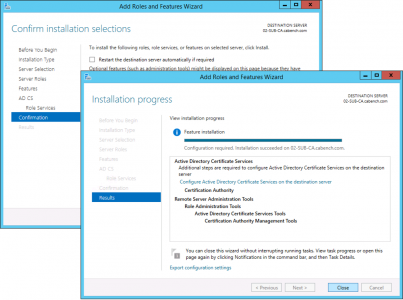
Next > Install > Close.
![Add Role]()
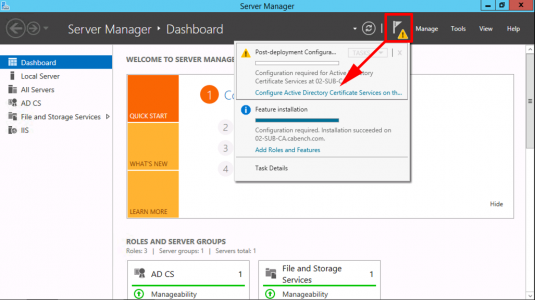
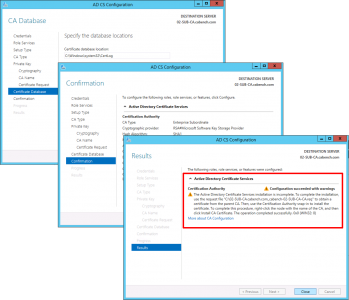
Configure Active Directory Certificate Services.
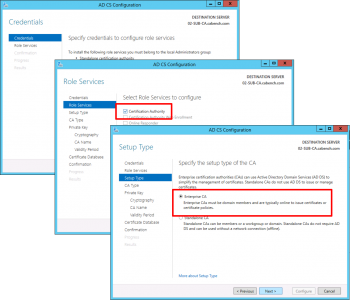
![Configure Role Services]()
Next > Select 'Certification Authority' and ' Certificate Authority Web Enrolment', if you selected it above > Next > Enterprise CA > Next.
![Enterprise CA]()
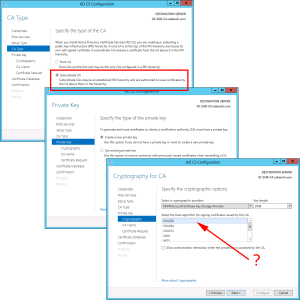
Subordinate CA > Next > Create New Private Key > Next > Change the Hash algorithm to SHA256 > Next.
![CA Sha 256]()
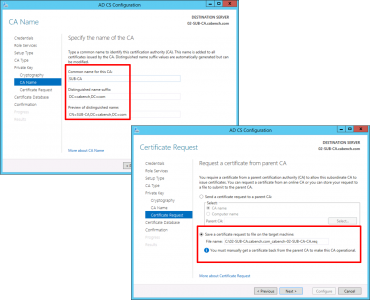
Give the CA a sensible Name > Next > Select 'Save certificate request to a file on the target machine' > Next.
![Sub CA Certificate]()
Next > Next > Install > Close.
Note: The warning is fine, we haven't installed the certificate yet, that's our next step
![CA Offline REquest]()
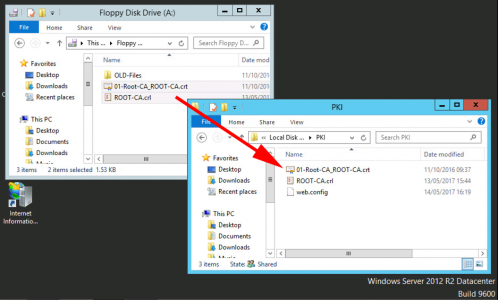
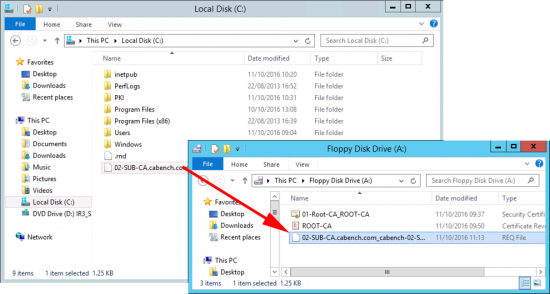
Copy your certificate request file, (ending .req) and put it on your floppy drive.
Note: I'm aware we are in the 21st century! I'm using virtual floppy drives.
![CA Request submit]()
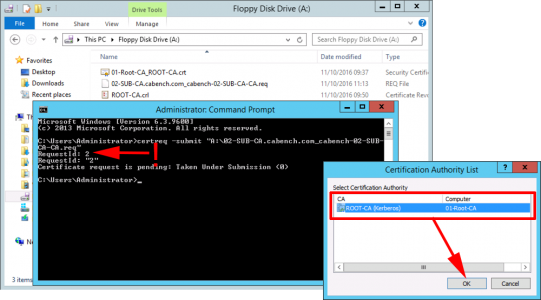
Present the floppy drive to your offline Root CA and execute the following command;
certreq -submit "A:\filename.req"
When prompted with the CA name > OK > Take a note of the RequestID you need this in a moment. (Leave the command window open!)
![Submit CA rEquest]()
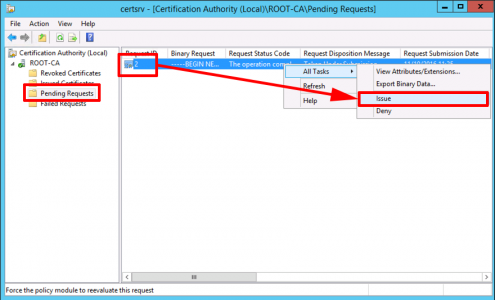
Open the Certificate Services Management Console > Server-name > Pending Requests > Locate your request > Issue the certificate.
![Issue SubCa Certificate]()
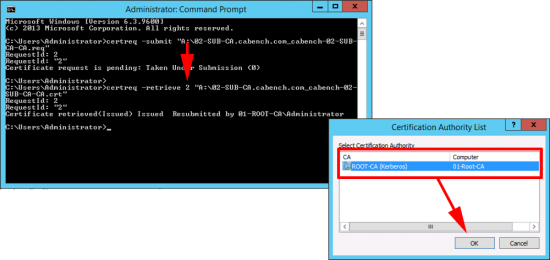
Back at command line issue the following command;
certreq -retrieve {RequestID} "A:\SubCA.crt"
When prompted with the CA name > OK.
![Retrive SubCA Certificate]()
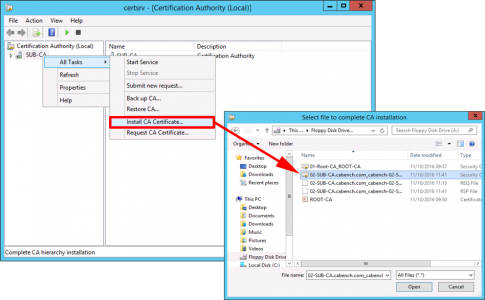
Check the certificate has appeared on your floppy drive, and present that back to your SubCA server > Open the Certificate Services Management console > Server-name > All Tasks > Install CA Certificate > Locate the cert > Open.
![Install SubCA Cert]()
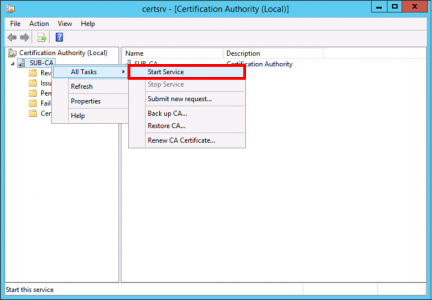
Start the Service (If it errors at this point you may have a problem with your CRL server see the following link for a temporary workaround until you can fix the CRL).
Certificate Services – Disable CRL Checking
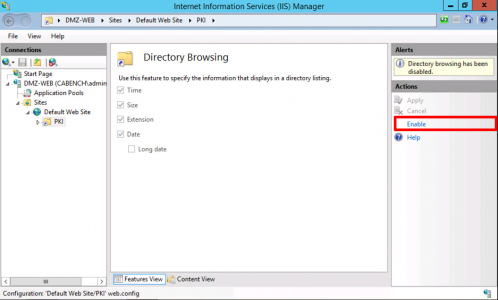
Troubleshooting: Open an MMC Snap-in and Add the Enterprise PKI snap-in to point you towards problems.
![Start Certificate Services]()
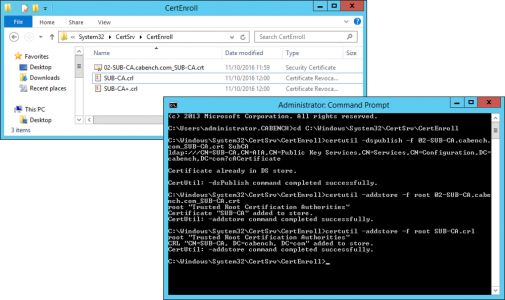
At this point I like to copy the Sub CA Cert to C:\Windows\Sytem32\Certsrv\CertEnroll. You should see the CRL for the SubCA already there (and maybe a delta CRL like the image below).
![Publish SubCA and CRL]()
Now we are going to publish those into AD, open an administrative command window and issue the following commands;
cd  C:\Windows\Sytem32\Certsrv\CertEnroll
certutil -dspublish -f SubCA.crt SubCA
certutil –addstore –f root SubCA.crt
certutil –addstore –f root SubCA.crl
certutil -dspublish  SubCA.crl
![Publish SubCA and CRL]()
Restart Certificate Services;
net stop certsvc
net start certsvc
![Set CRL]()
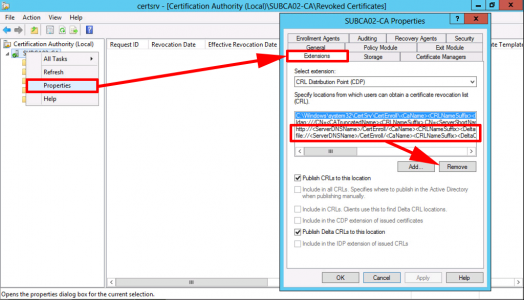
Back in Certificate Services > Properties > Extension > Remove the http and file entries. NOT the ldap or the one that's pointing to C:\Windows.
![Sun CA Remove CRL]()
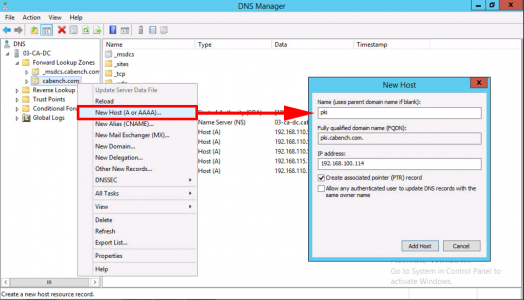
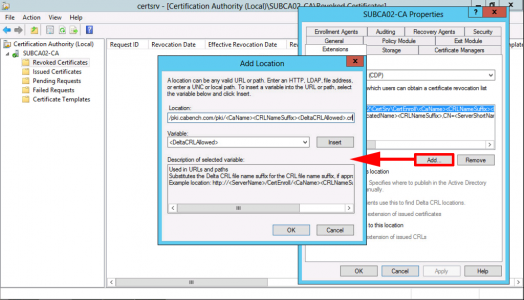
With CRL Distribution Point showing > Add > Type in http://pki.{your-domain}/pki/<CaName><CRLNameSuffix><DeltaCRLAllowed>.crl
Note: You can add the variables in to avoid typing them, DON'T FORGET to put .crl on the end!
OK.
![Add http CRL Location]()
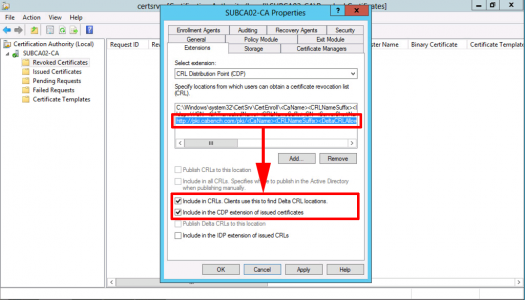
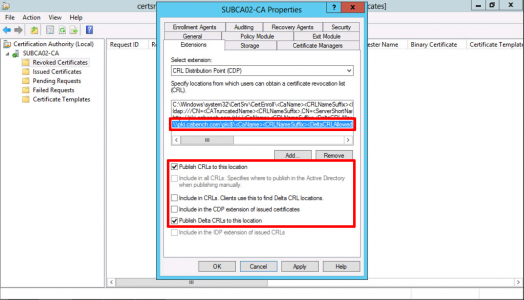
With your new URL selected, tick;
- Include in CRLs. Clients use this to find DeltaCRL locations.
- Include in the CDP extension of issued certificates.
Apply > OK > Services will Restart.
![Publish CRL Windows Server]()
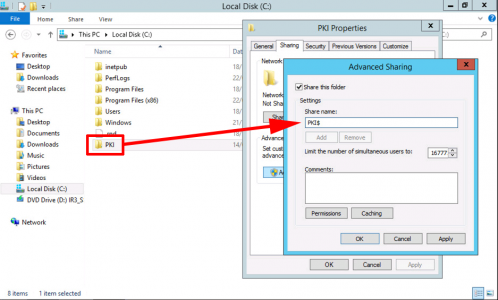
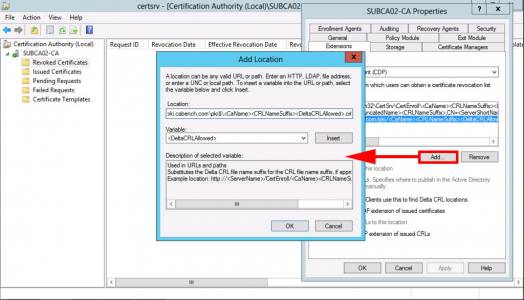
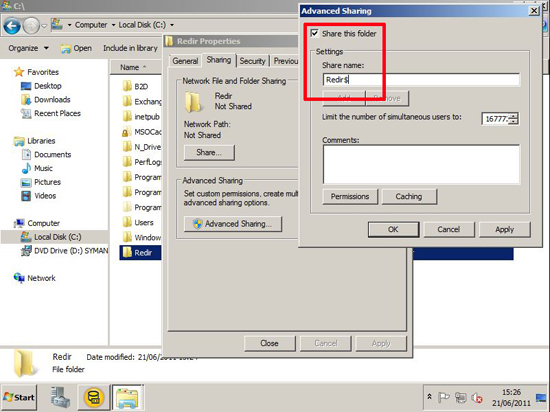
Once Again, click Add, this time type in the UNC path to your hidden PKI share on your CRL Server, e.g.
\\pki.{your-domain}\pki$\<CaName><CRLNameSuffix><DeltaCRLAllowed>.crl
Note: You can add the variables in to avoid typing them, DON'T FORGET to put .crl on the end!
OK.
![CRL UNC Path Windows 2016]()
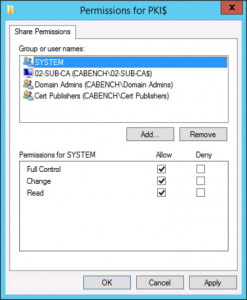
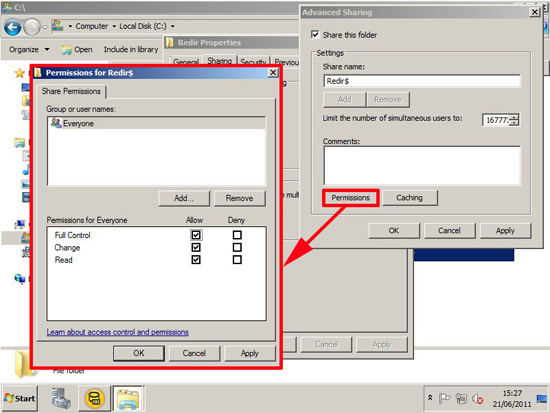
With your UNC path selected, tick;
- Publish CRLs to this location.
- Publish Delta CRLs to this location.
Apply > OK > Services will restart.
![UNC Path for Windows CRL]()
That's your PKI environment stood up and ready to go, you may also want to setup OCSP, see the following article;
Microsoft Certificate Services Configuring OCSP
You can now issue certificates, some of the things you might want to consider setting up are;
Windows Server 2012 – Enable LDAPS
Deploying Certificates via ‘Auto Enrollment’
Windows Server 2012 – Secure RDP Access with Certificates
Install and Configure Certificate Enrolment Policy Web Service
Related Articles, References, Credits, or External Links
NA