KB ID 0001645
Problem
I have written about Enabling LDAPS a long time ago, but it’s a subject that’s about to become important again, so I’ll revisit the subject. Microsoft are about to ‘enforce’ LDAPS authentication against their domain controllers, in the March 2020 round of updates.
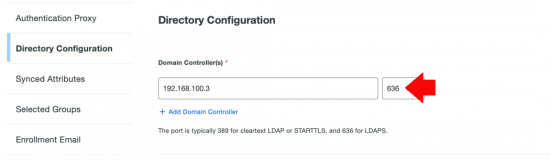
What does that mean? Well lookups against LDAP will now need to be secure, (i.e. SSL protected and over TCP port 636,) where as before they were in plain text and over TCP port 389.
So you need to start worrying about this now!
Solution
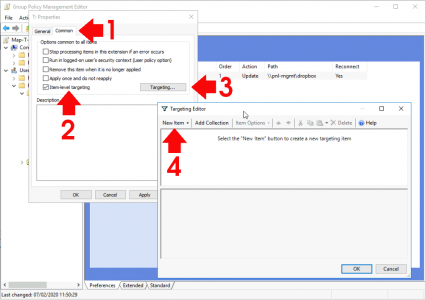
Enable LDAPS for you Domain Controllers
As I’ve mentioned above I’ve covered this before but as a quick recap, you need to have Microsoft Certificate services deployed, please don’t just add the role to a server, and click ‘Next’ furiously. Take this opportunity to deploy Certificate Services properly!
Microsoft PKI Planning and Deploying Certificate Services
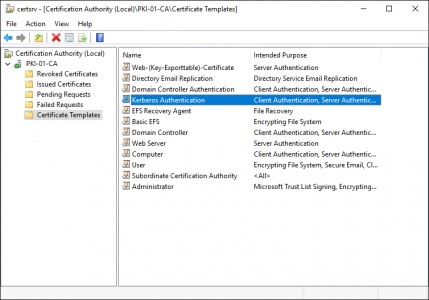
Then make sure you have a Kerberos Authentication certificate template published;
![Kerberos LDAPS Certificate]()
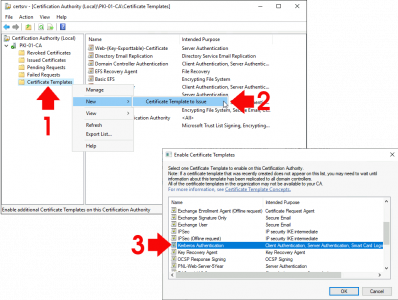
If you do not: Simply follow the steps shown below.
![Issue Kerberos LDAPS Certificate]()
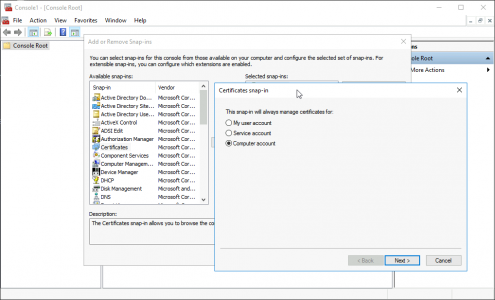
Then on you domain controller(s): Windows Key +R > mmc.exe > OK > File > Add/Remove Snap-in > Certificates > Add > Computer > Local Computer.
![MMC Certificate Snap-in]()
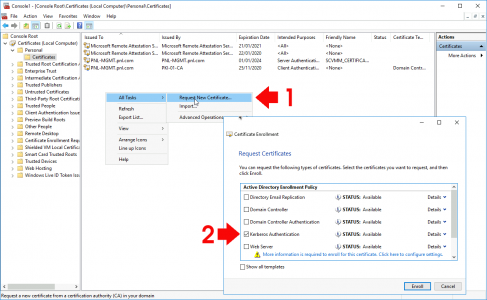
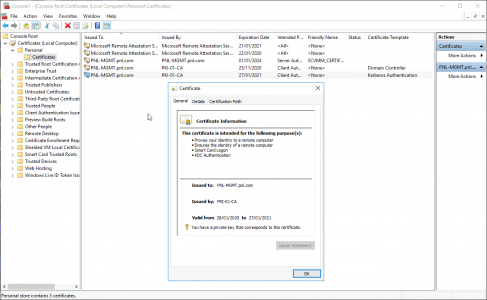
Expand Certificates > Personal > Certificates > Request a Kerberos Authentication certificate.
![Enroll for LDAPS Certificate]()
Ta-Da!
![Switch to LDAPS]()
Windows Server Testing LDAPS
The simplest way, I’ve found to do this is to use Ldp.exe, simply run Ldp from command line. Note: Ldp will normally only be found on domain controllers, and servers/clients that have the ‘AD and DS and AD LDS Management tools‘ installed.
Connection > Connect > Enter the FQDN of the domain controller to test > Tick SSL > Ensure Port is set to 636 > OK
![Test LDAPS with LDP]()
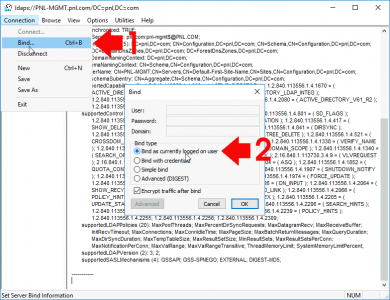
Connections > Bind > Bind as currently logged on user, (unless you want to test a particular account), any member of domain users should work > OK.
![Test LDAPS with LDP Bind SSL]()
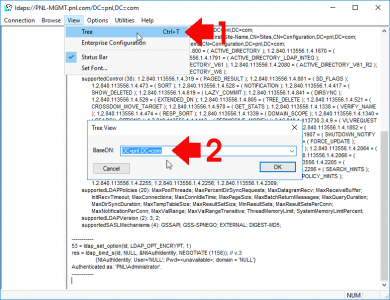
View > Tree > Select the root DN of your domain > OK
![Browse AD via SSL LDAPS]()
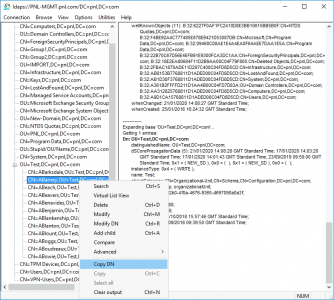
If all is well you should be able to browse your Active Directory.
Tech Tip: I do this every time I need to enter a DN, because you can browse to any object and copy its DN from here, (and I’m too lazy to type them out by hand!)
![Get AD User DN]()
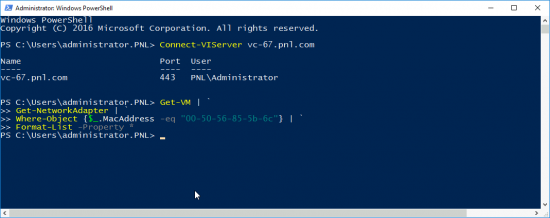
Test LDAPS Port With PowerShell
If you want to check the port is open, i.e. not blocked in the Windows firewall or a physical firewall in between you and the server use;
Test-NetConnection {FQDN-Of-Server} -Port 636
![Test LDAPS With PowerShell]()
Additional LDAP Test Tools
Over on Github theres also a tool called LDAP Explorer Tool, if you want to do some more granular testing;
![Test LDAPS With LDAP Explorer Tool]()
Find Out What’s Using LDAP and Prepare for LDAPS
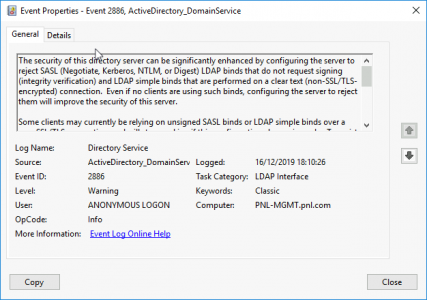
If you don’t enforce LDAPS already then your Directory Service Event logs will be full of Event ID 2886, and Event ID 2887
Event ID 2886
![Event Id 2886]()
Log Name: Directory Service
Source: Microsoft-Windows-ActiveDirectory_DomainService
Date: xx/xx/xxxx xx:xx:xx
Event ID: 2886
Task Category: LDAP Interface
Level: Warning
Keywords: Classic
User: ANONYMOUS LOGON
Computer: (Server-Name}
Description:
The security of this directory server can be significantly enhanced by configuring the server to reject SASL (Negotiate, Kerberos, NTLM, or Digest) LDAP binds that do not request signing (integrity verification) and LDAP simple binds that are performed on a clear text (non-SSL/TLS-encrypted) connection. Even if no clients are using such binds, configuring the server to reject them will improve the security of this server.
Some clients may currently be relying on unsigned SASL binds or LDAP simple binds over a non-SSL/TLS connection, and will stop working if this configuration change is made. To assist in identifying these clients, if such binds occur this directory server will log a summary event once every 24 hours indicating how many such binds occurred. You are encouraged to configure those clients to not use such binds. Once no such events are observed for an extended period, it is recommended that you configure the server to reject such binds.
For more details and information on how to make this configuration change to the server, please see http://go.microsoft.com/fwlink/?LinkID=87923.
You can enable additional logging to log an event each time a client makes such a bind, including information on which client made the bind. To do so, please raise the setting for the “LDAP Interface Events” event logging category to level 2 or higher.
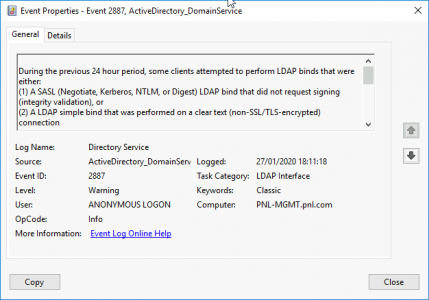
Event ID 2887
![Event Id 2887]()
Log Name: Directory Service
Source: Microsoft-Windows-ActiveDirectory_DomainService
Date: xx/xx/xxxx xx:xx:xx
Event ID: 2887
Task Category: LDAP Interface
Level: Warning
Keywords: Classic
User: ANONYMOUS LOGON
Computer: (Server-Name}
Description:
During the previous 24 hour period, some clients attempted to perform LDAP binds that were either:
(1) A SASL (Negotiate, Kerberos, NTLM, or Digest) LDAP bind that did not request signing (integrity validation), or
(2) A LDAP simple bind that was performed on a clear text (non-SSL/TLS-encrypted) connection
This directory server is not currently configured to reject such binds. The security of this directory server can be significantly enhanced by configuring the server to reject such binds. For more details and information on how to make this configuration change to the server, please see http://go.microsoft.com/fwlink/?LinkID=87923.
Summary information on the number of these binds received within the past 24 hours is below.
You can enable additional logging to log an event each time a client makes such a bind, including information on which client made the bind. To do so, please raise the setting for the “LDAP Interface Events” event logging category to level 2 or higher.
Number of simple binds performed without SSL/TLS: 0
Number of Negotiate/Kerberos/NTLM/Digest binds performed without signing: 1
Enable LDAPS Logging / Reporting
So you need to enable logging then when insecure (non LDAPS) connections are made, another Event ID will be logged which will point you towards what needs to be fixed.
Open Regedit and navigate to;
HKLM\SYSTEM\CurrentControlSet\Services\NTDS\Diagnostics
Change the ’16 LDAP Interface Events’ DWAORD value to ‘2’ > OK.
![Enable LDAP LDAPS Logging]()
Or Execute the following command;
Reg Add HKLM\SYSTEM\CurrentControlSet\Services\NTDS\Diagnostics /v “16 LDAP Interface Events” /t REG_DWORD /d 2
Or Execute the following Powershell command;
New-ItemProperty -Path ‘HKLM:\SYSTEM\CurrentControlSet\Services\NTDS\Diagnostics’ -Name “16 LDAP Interface Events” -Value 2 -PropertyType DWORD -Force
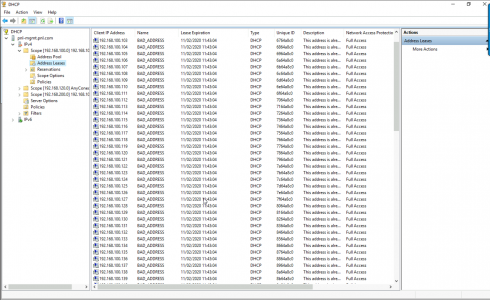
Checking for Insecure LDAP (TCP 389) Connections
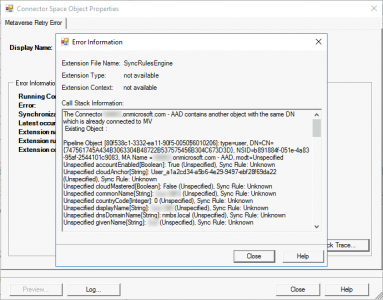
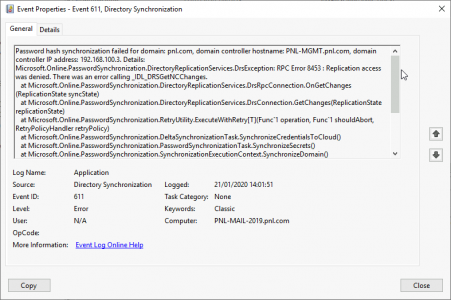
Now you can locate the insecure connections by looking for Event ID 2889
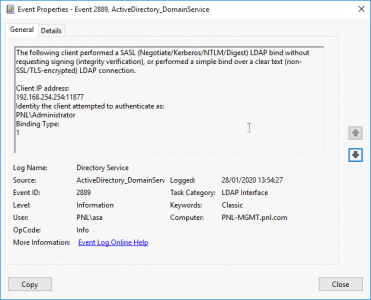
Event ID 2889
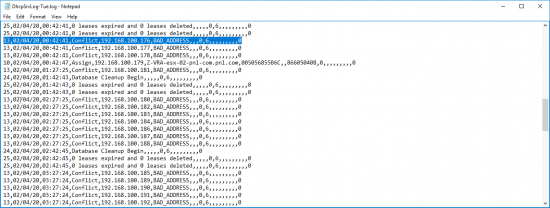
![Event Id 2889]()
Above you can see the IP address of the device trying to bind insecurely, you can also see that Anonymous Login was attempted’.
![Event Id 2889]()
Above you can see the IP address of the device trying to bind insecurely, you can also see the domain username that is being used ‘PNL\asa’.
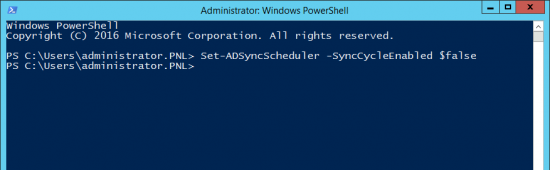
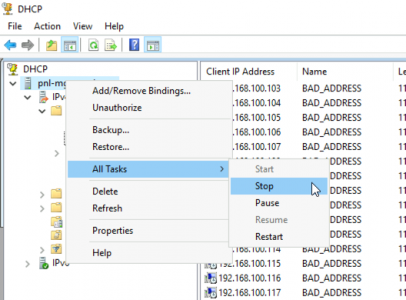
Disable LDAPS (Temporarily)
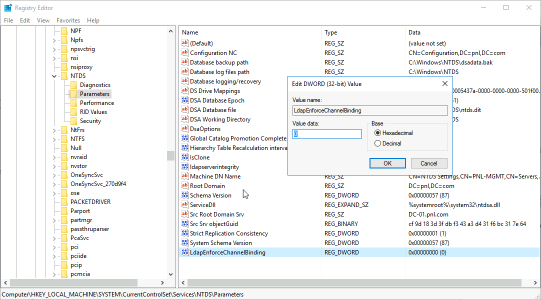
LDAPS is enabled and disabled with the following registry key;
HKLM\SYSTEM\CurrentControlSet\Services\NTDS\Parameters\LdapEnforceChannelBinding
Note: You will need to CREATE this DWORD yourself;
![Disable LDAPS]()
Values: 0 Disabled, and 1 Enabled
WARNING: Take note I said temporarily, just because you have a crappy old insecure appliance or service that can’t use LDAPS, does not mean you should simply turn off security. Get it fixed! However, I appreciate you work in the real world, and if systems are down and you are getting shouted at, then fair enough. But you should have read this when I wrote in January 2020 my friend – bet you wished you followed me on Twitter or Facebook now eh?
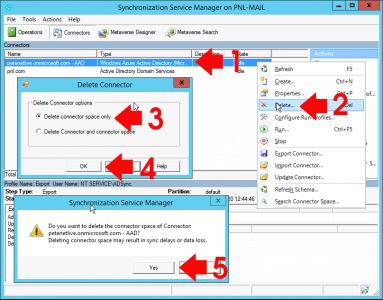
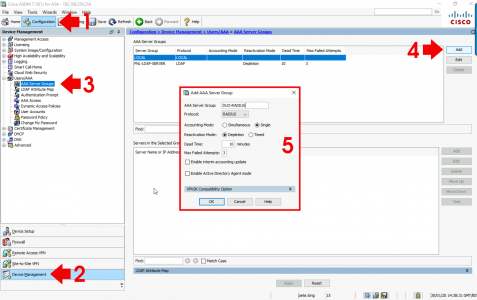
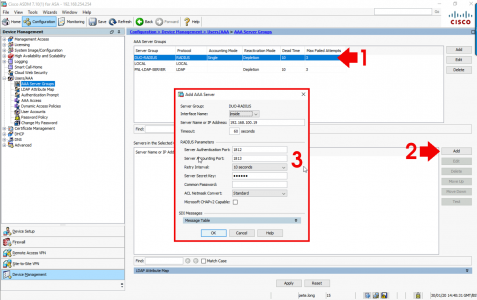
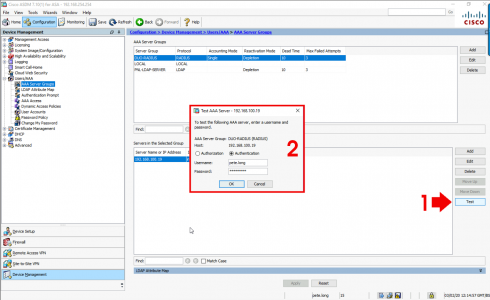
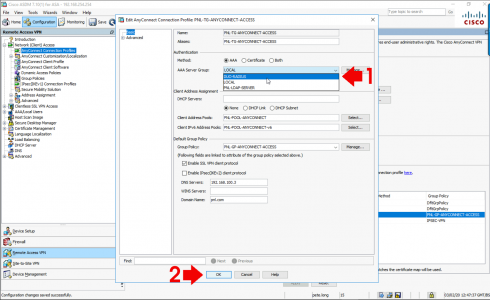
Cisco ASA Change from LDAP to LDAPS
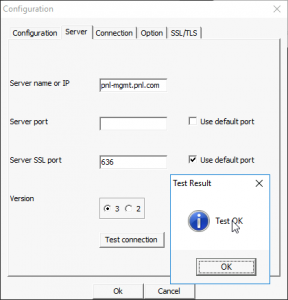
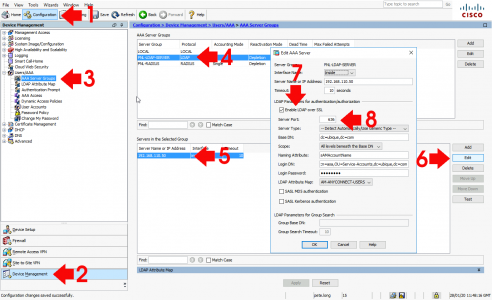
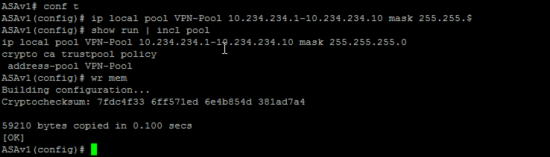
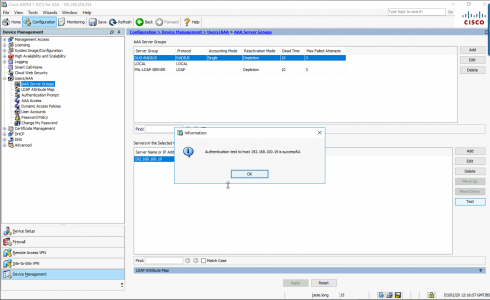
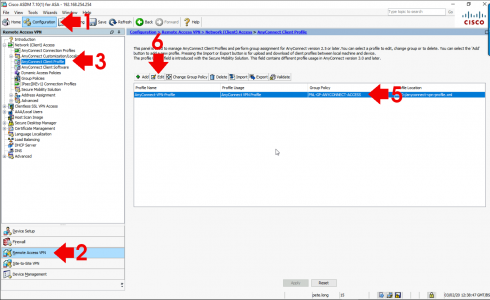
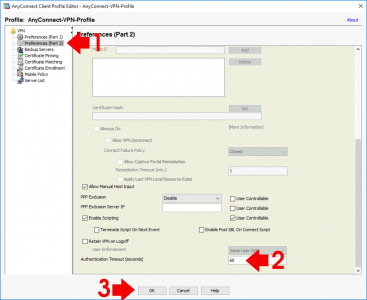
Well I’m the Cisco ASA guy so what happens if you are securing AAA access using LDAP on you firewall (for AnyConnect, Remote VPN, or device access). How do you swap to LDAPS? Like so
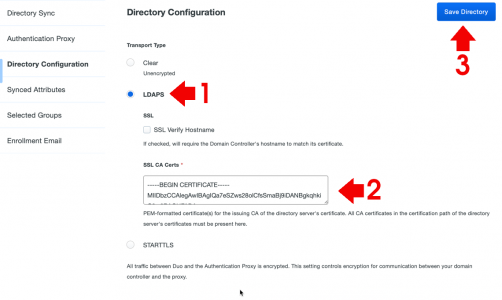
![ASA Switch to LDAPS.]()
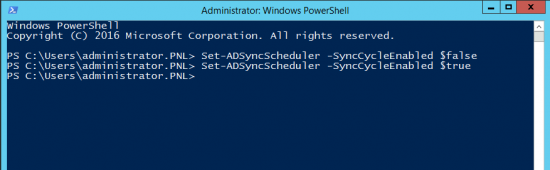
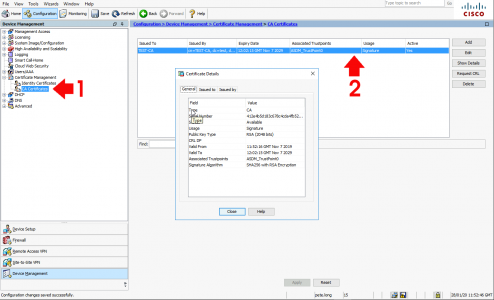
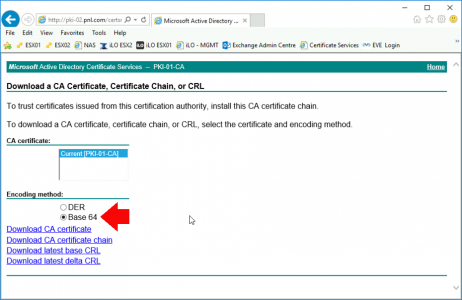
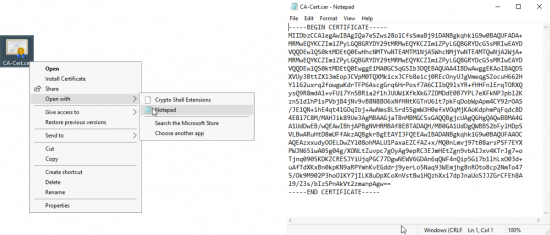
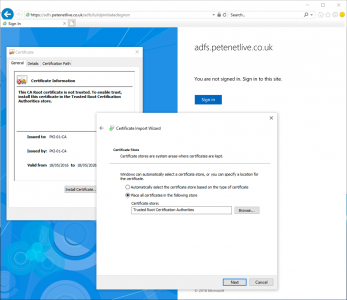
You will also need to upload the Root-CA certificate from your CA Services Server to the ASA, (so it trusts the servers Kerberos Certificate).
![ASA Trust CA Cert]()
Related Articles, References, Credits, or External Links
Moving Certificate Services To Another Server
Microsoft PKI Planning and Deploying Certificate Services
Upgrade Your Microsoft PKI Environment to SHA2 (SHA256)