KB ID 0001473
Problem
If you are retiring a CA Server, or there’s a problem with the server and you want to move Microsoft Certificate Services to another server, the procedure is pretty straight forward.
BE AWARE: We are moving the CA Server, NOT the server name/FQDN, the two things are NOT the same, (you might have called them the same thing!) But a Certificate Authority has a name of its own, and that what we are going to move.
So the new server doesn’t have to have the same name? No, it can do if you really want, but that’s an added layer of complication I can’t see the point of?
In the video below, I’m migrating from Server 2008 R2 to Server 2019, and I’m also moving CRLs and OSCP responders. In the screenshots below I’m moving from Server 2016 to Server 2016, but the process is pretty much identical all the way back to Server 2003.
Solution
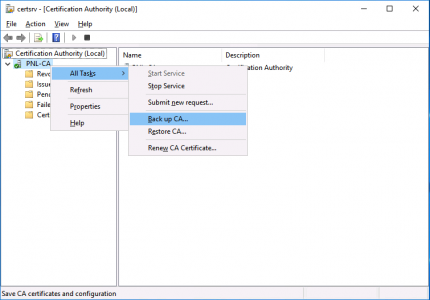
On the ‘Source‘ server, open the Certificate Services management console > Right click the CA NAME > All Tasks > Back up CA.
![Transfer CA to Another Server]()
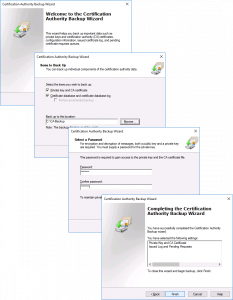
The backup wizard will open, Next > Tick BOTH options > Select a Backup Location > Next > Set a password (you will need this to set the new CA up!) > Next > Finish.
![Backup CA Settings Wizard]()
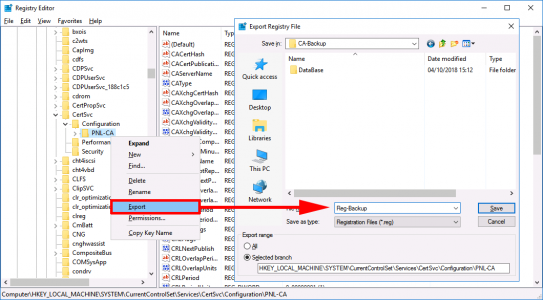
Now we need to take a backup of the Registry key that holds the information for this CA server. Run ‘regedit’ > Navigate to;
HKEY_LOCAL_MACHINE > SYSTEM > CurrentControlSet > Services > CertSvc > Configuration > {CA-NAME}
Export a copy of this key, (save it in the same folder that you backed up to earlier).
![Export CA Settings Windows 2016]()
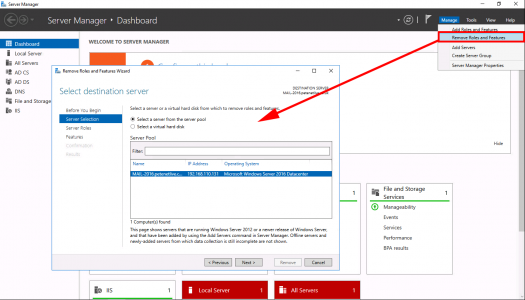
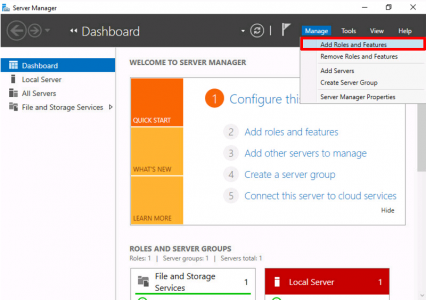
Now we need to uninstall CA Services from this server. Server Manager > Manage > Remove Roles and Services > Next.
![Remove Roles Server 2016]()
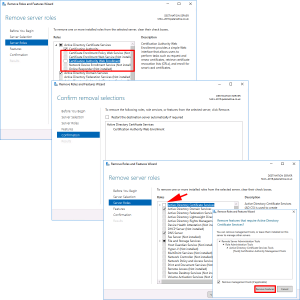
REMOVE all the CA role services first! > Complete the Wizard, then launch the wizard again and select ‘Active Directory Certificate Services > At the pop-up select ‘Remove Features” > Next.
![Remove CA Roles Windows 2016]()
Next > Next > Next > Close.
![Transfer Certificate Services to Server 2016]()
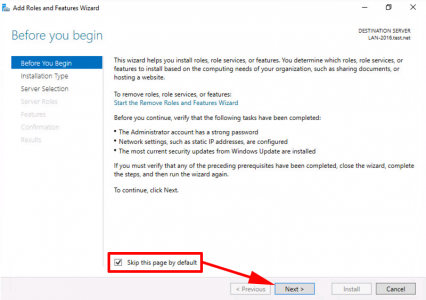
Setup Certificate Services on the Target/New Server
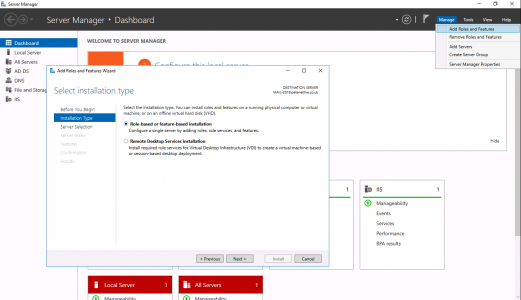
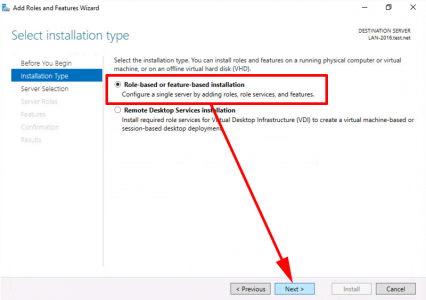
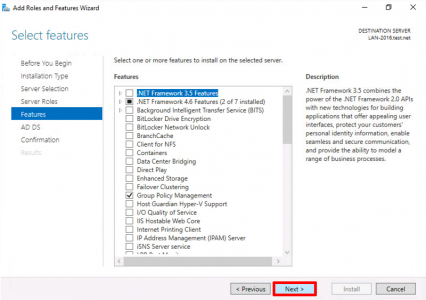
Server Manager > Add Roles and Features > Next.
![Install Role or Feature 2016]()
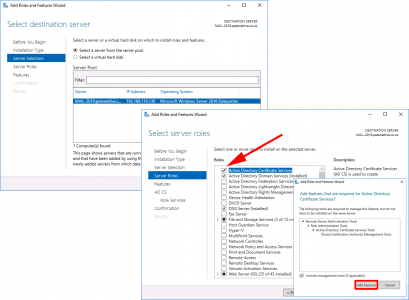
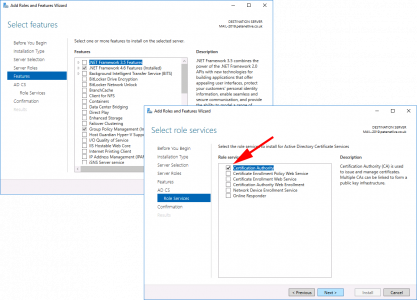
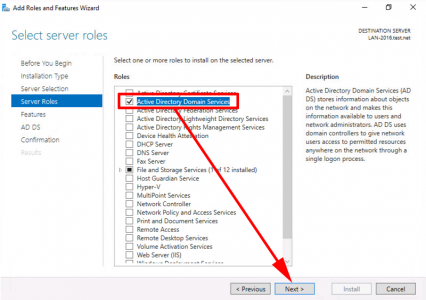
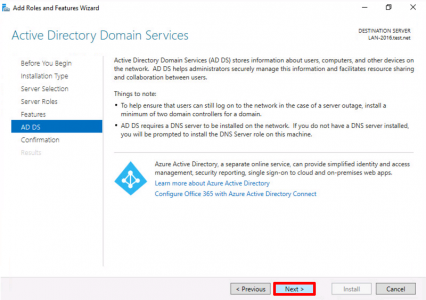
Next > Select ‘Active Directory Certificate Services’ > Add Features > Next.
![Install CA Role 2016]()
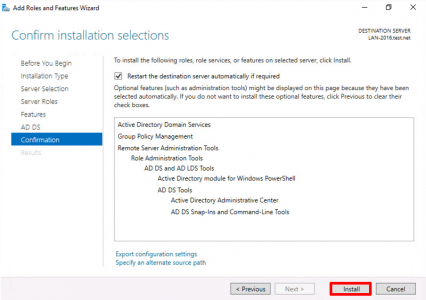
For now let’s just stick the Certification Authority > Add the other role services later* > Next.
*Note: I’ve written about all these role services before, just use the search function, (above.) If you are unsure what they all do.
![Install Certificate Services Role 2016]()
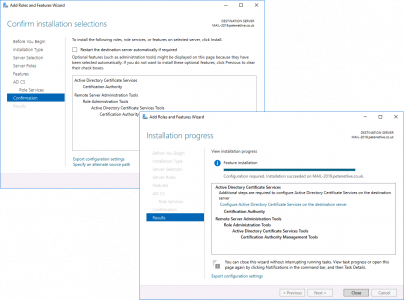
Next > Close.
![Setup Certificate Services]()
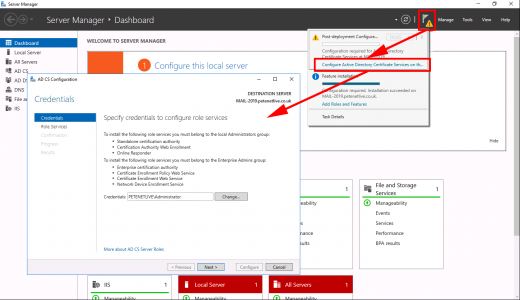
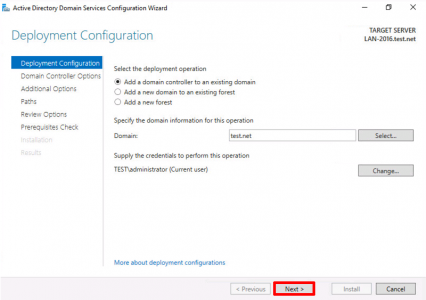
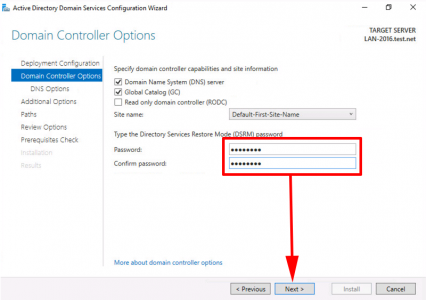
Warning > Configure Active Directory Certificate Services > Next.
![Restore Certificate Services]()
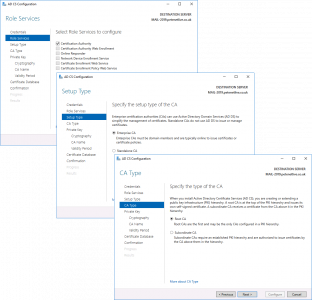
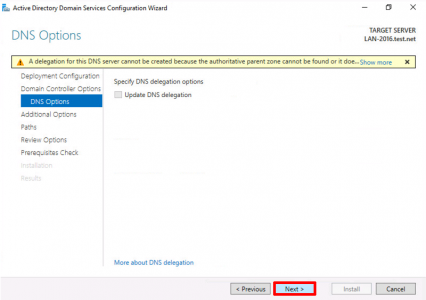
Next > Enterprise CA (Unless it’s an offline non domain joined CA) > Root CA (unless it’s a subordinate CA!) > Next.
![Configure 2016 Certificate Services]()
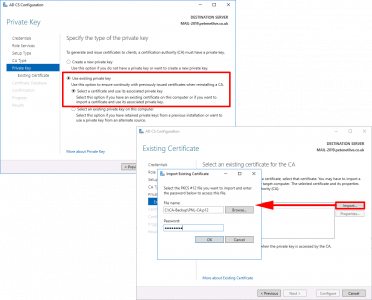
> Select ‘Use existing private key‘ > Select ‘Select a Certificate and use its associated private key‘ > Next > Import > Browse > In your backup folder locate the certificate (it will have a .p7b extension.) > Enter the password > OK > Select the Cert > Next.
![Restore Certificate Services Differnet Server]()
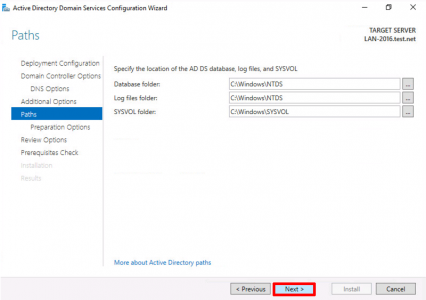
Next > Next > Configure > Close.
![Migrate Certificate Services Differnet Server]()
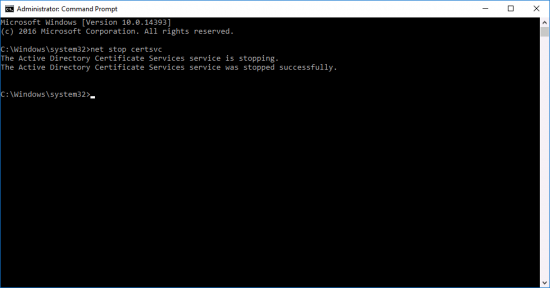
Stop Certificate Services;
![Stop Certificate Services]()
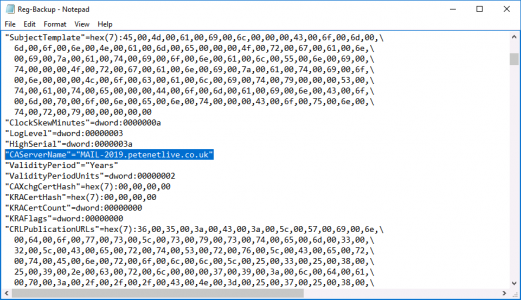
If your new server has a different hostname/FQDN open the registry file you exported above with Notepad, Locate and change the CAServerName entry to the name of the NEW server.
![Change CA Server Name]()
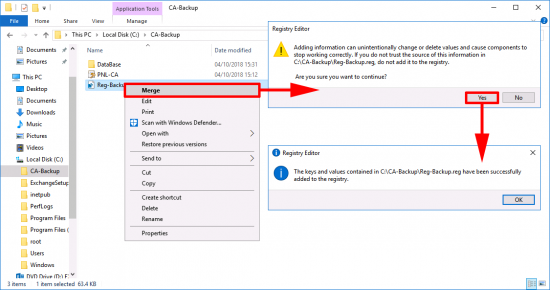
Right click the registry backup > Merge > Yes > OK.
![Import CA Settings to Registry]()
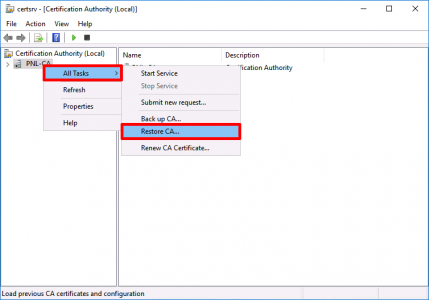
Launch the Certificate Services management console > Right Click the CA NAME > All Tasks > Restore CA.
![Restore Windows CA]()
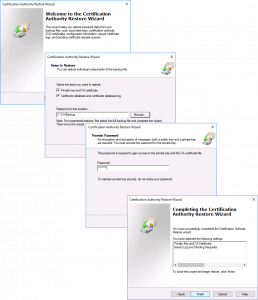
The restore wizard will start > Next > Browse to the folder with your backup in > Next > Enter the password you used (above) > Next > Finish.
![2016 Restore Windows CA Wizard]()
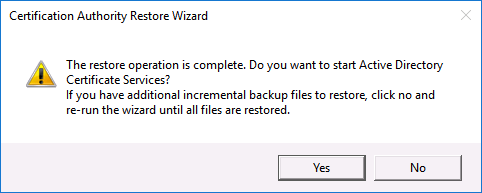
You will be prompted to start the Certificate Services service > Yes.
![Restart Restored Windows CA]()
Related Articles, References, Credits, or External Links
NA