KB ID 0001399
Problem
Always On VPN was a bit of a misnomer when it was released, as it was only really ‘on’ when a user logged on. So when comparing it with ‘Direct Access‘ it didn’t have the capacity to ‘Manage Out’. With the release of Windows 10 (1709) this has been rectified with ‘Device Tunnels’, (more on that later).
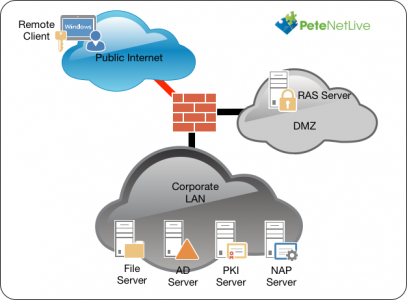
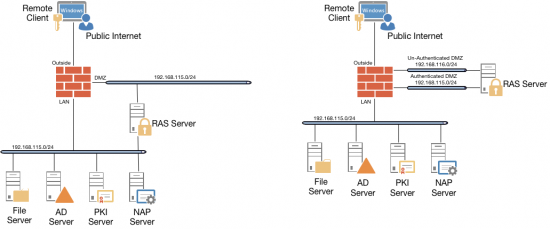
The solution uses RAS, NAP (NPS), and PKI (Certificate Services). Obviously Active Directory is a requirement, and in addition I’ve also got a file server setup just for ‘testing’ access to domain resources.
Step 1: Active Directory Work
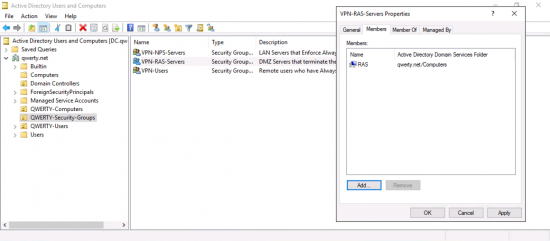
You will need to setup some security groups in AD, I’m going to use;
- VPN-NPS-Servers
- VPN-RAS-Servers
- VPN-Users
Note: You can of course use ‘domain users’ if you are rolling this out domain wide.
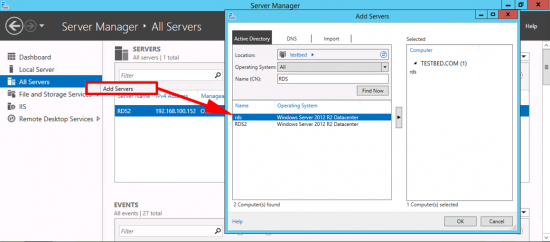
Add your NAP/NPS server(s) to the VPN-NPS-Servers group, (remember you need to add computers to the search criteria, or you wont find them).

Add your RAS server(s) to the VPN-RAS-Servers group.
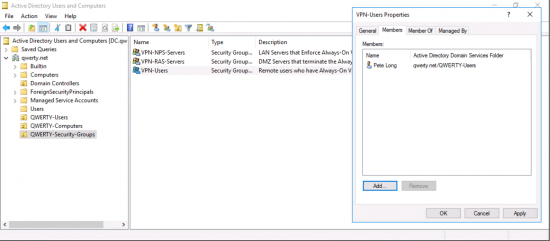
Add your domain users(s) to the VPN-Users group.
Step 2: PKI (Certificate Services)
PLEASE: Don’t just race forward and install Certificate Services. Every domain certificate problem I’ve ever had to worked on has been the result of someone ‘just lashing it in’. Take the time to do it properly, and think about your domain PKI design, consider things like, Offline Root CA’s, Multi-Tier Sub CA’s, CRL, and OCSP.
Luckily, I’ve spent a ton of time already on Certificate services, look though the following article;
Microsoft PKI Planning and Deploying Certificate Services
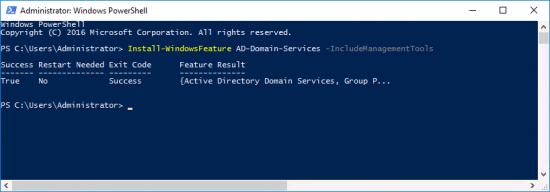
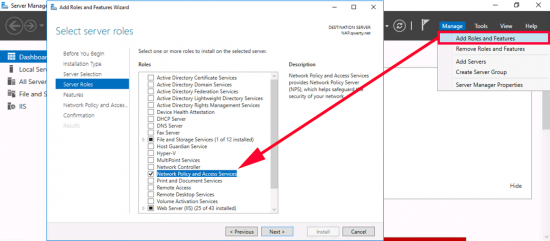
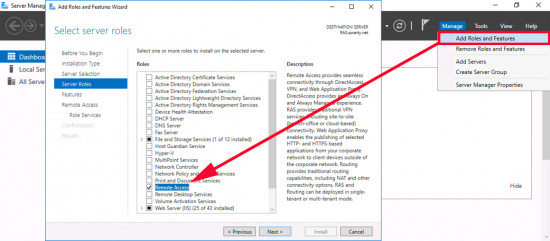
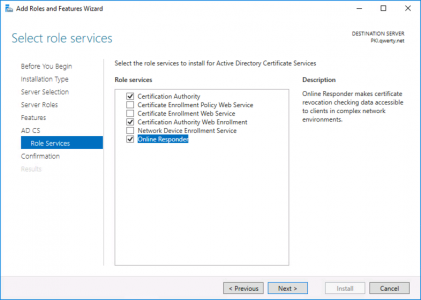
If you are simply setting this up on the test bench, or for a POC, (in a non-production domain). Then add the role from Server Manager.
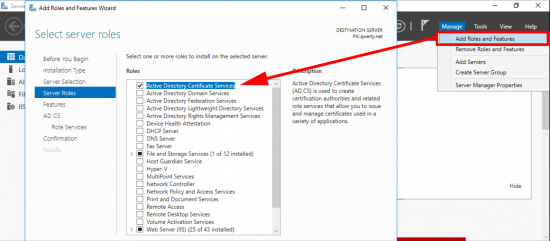
These are the roles I deploy, but for this solution you only really need the Certification Authority, role.
Note: If you are interested what the other roles do, then search for them above, (I’ve blogged about NDES, and the Enrollment Web Services before).
Step 3: Certificate Templates
You will need to create and publish three certificate templates;
- VPN-User (Based on the User Template)
- NPS-Servers (Based on the RAS and IAS Template)
- VPN-Servers (Based on the RAS and IAS Template)
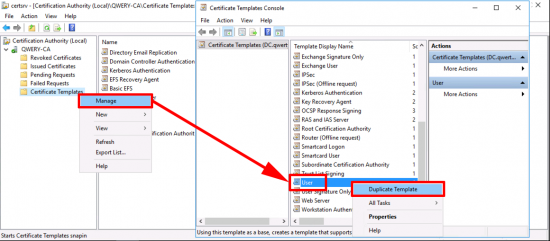
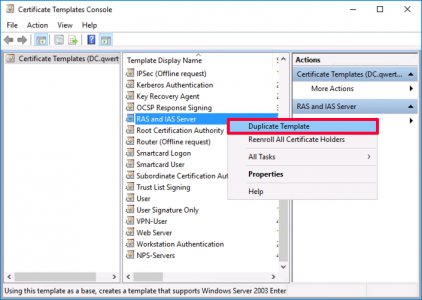
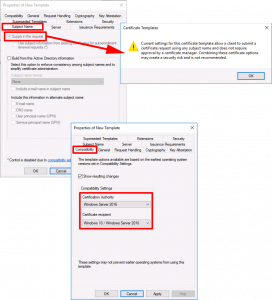
VPN-User Certificate: Open the certificate services management console > Certificate Teplates > Manage > User > Duplicate Template.
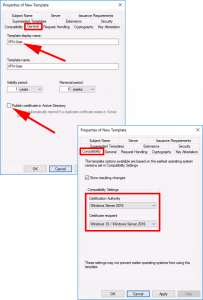
General Tab:
- Template Display Name: VPN-User
- Publish certificate in Active Directory UNTICK.
Compatibility Tab:
- Certification Authority: Windows Server 2016 (Though 2012 R2 will work)
- Certificate Recipient: Windows 10 (Though Windows 8.1 will work)
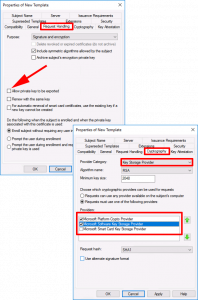
Request Handling Tab:
Allow private key to be exported: UNTICK
Cryptography Tab:
- Provider Category: Key Storage Provider
- Providers: First: Microsoft Platform Crypto Provider, Second: Microsoft Software Key Storage Provider.
Note: Theres two because the first one requires a TPM chip, if the client machine does not have one the procedure fails. By allowing ‘Microsoft Software Key Storage Provider’ if will ‘fall-back’ to that option, if there is not TPM chip.
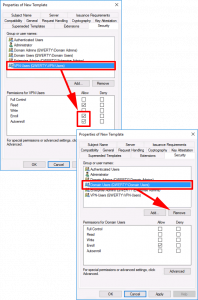
Security Tab:
- ADD: VPN-users: GRANT: Read, Enrol, and Autoenroll.
- DELETE: Domain Users
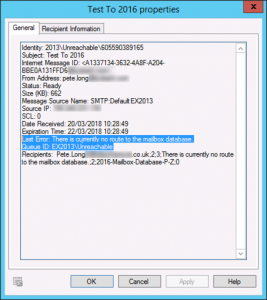
Note: In a test environment, you may also want to UNTICK the option ‘Include e-mail name in subject name‘ on the Subject Name tab or you may see this problem.
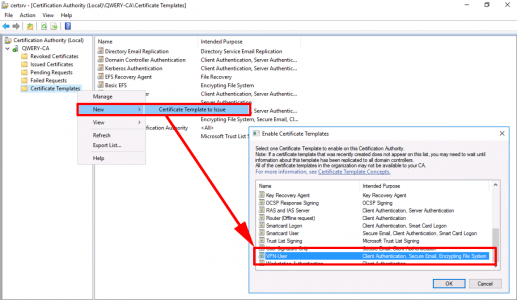
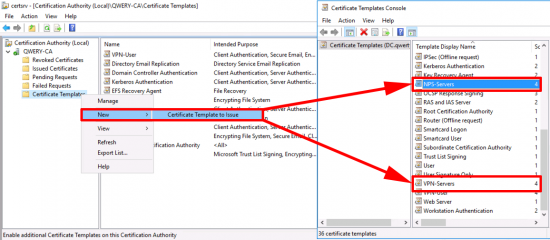
Issue the certificate template.
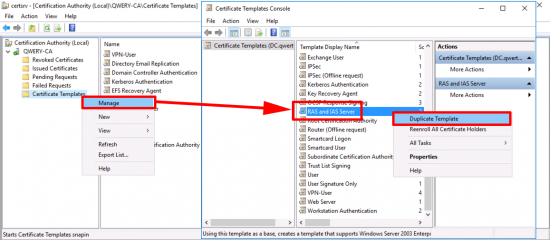
Repeat the procedure but this time make a duplicate of the RAS and IAS template.
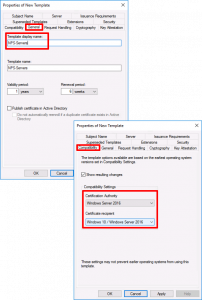
General Tab:
- Template Display Name: NPS-Servers.
Compatibility Tab:
- Certification Authority: Windows Server 2016 (Though 2012 R2 will work).
- Certificate Recipient: Windows 10 (Though Windows 8.1 will work).
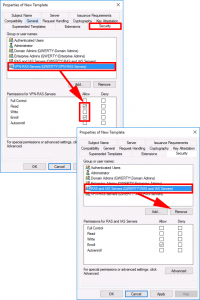
Security Tab:
- ADD: VPN-NPS-Servers: GRANT: Read, Enrol, and Autoenroll.
- DELETE: RAS and IAS Servers.
Apply > OK > Now make a second duplicate of the RAS and IAS certificate template.
General Tab:
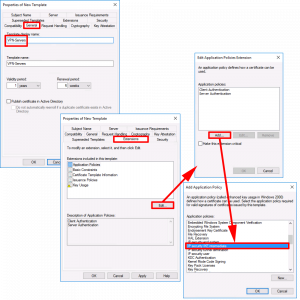
- Template Display Name: VPN-Servers.
Extensions Tab:
- Edit > Add > IP Security IKE Intermediate > OK > OK.
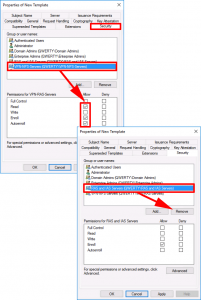
Security Tab:
- ADD: VPN-RAS-Servers: GRANT: Read and Enrol ONLY.
- DELETE: RAS and IAS Servers.
Subject Name Tab:
Supply In the Request: TICK (Accept the warning).
Compatibility Tab:
- Certification Authority: Windows Server 2016 (Though 2012 R2 will work).
- Certificate Recipient: Windows 10 (Though Windows 8.1 will work).
Issue Both of the server certificate templates.
Step 4: Group Policies Auto-Enrolment
Again, I’ve written about this before, so for some extra reading on the subject, see the following article;
Deploying Certificates via ‘Auto Enrollment’
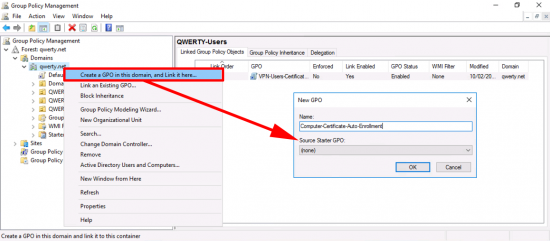
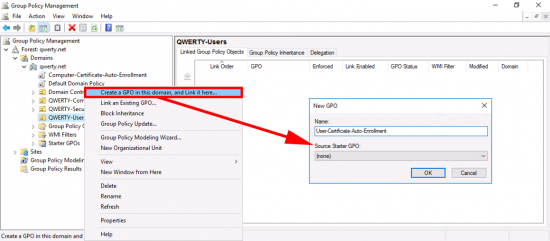
In the’ Group Policy Management Console’ create a new GPO, I’m simply linking it to the root of the domain, you can of course link it to the OUs that your RAS and NPS servers live in.
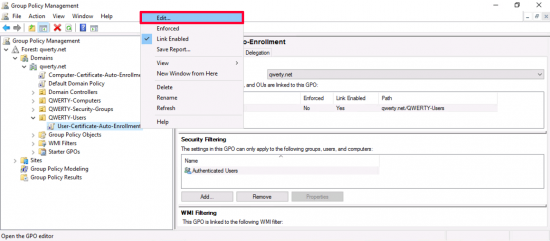
Edit the policy.
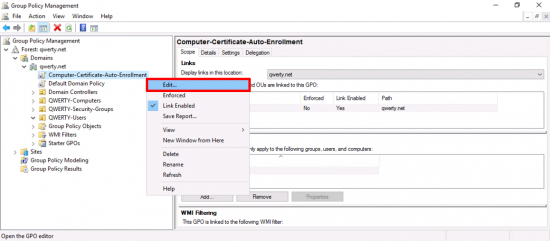
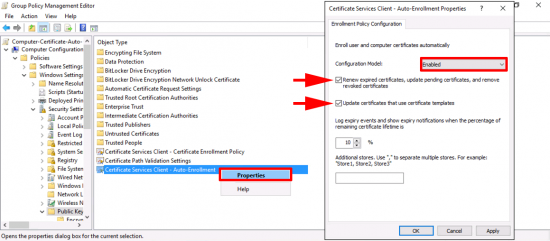
Navigate to: Computer Configuration > Policies > Windows Settings > Security Settings > Public Key Policies > Certificate Services Client – Auto-Enrolment > Properties.
- Configuration Model: Enabled.
- Renew expired certificates, update pending certificates, and remove revoked certificates: TICK.
- Update certificates that use certificate templates: TICK.
Close and exit the policy editor.
Now Im creating another policy for my USER auto enrolment, (I could have used the same policy above, that’s linked to the root of the domain, but I like to keep them separate, it’s your choice). Anyway just ensure the policy is linked to your USERS.
Edit the policy.
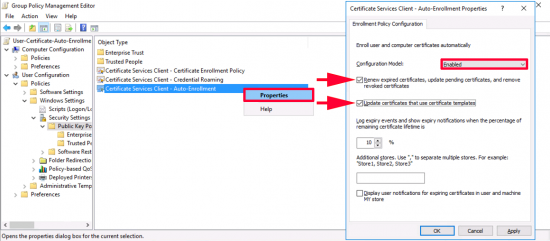
Navigate to: User Configuration > Policies > Windows Settings > Security Settings > Public Key Policies > Certificate Services Client – Auto-Enrolment > Properties.
- Configuration Model: Enabled.
- Renew expired certificates, update pending certificates, and remove revoked certificates: TICK.
- Update certificates that use certificate templates: TICK.
Step 5: Testing CertificateDeployment
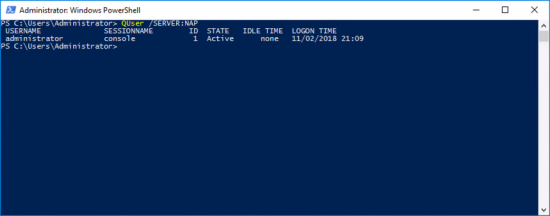
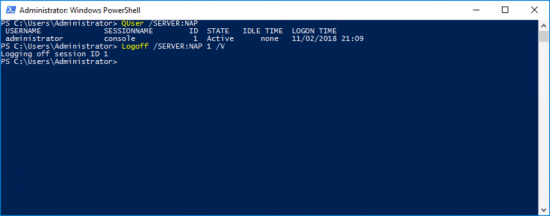
Remember we are deploying two computer certificates and one user certificate, and they are all based on group membership, so your servers need to be rebooted before they will get their group membership, and your user(s) need to log off and log on. Also bear in mind you might want to force group policy, see the following article;
Windows – Forcing Domain Group Policy
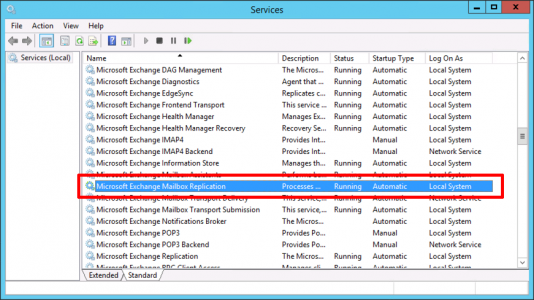
NPS-Servers Certificate: Windows Key+R > certlm.msc > Personal > Certificates > You should have a certificate based on the NPS-Server template.
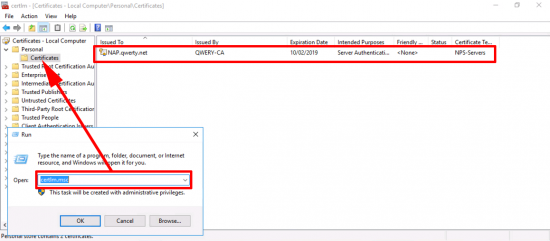
VPN-Server Certificate: Windows Key+R > certlm.msc > Personal > Certificates > All Tasks > Request New Certificate > Next.
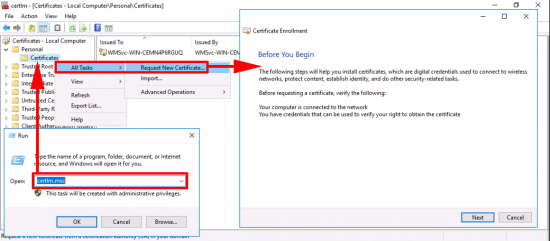
Note: You are doing this one manually, because this certificate does not auto-enrol, that’s because the certificate will need a different common name on it, (the public DNS name of the RAS server).
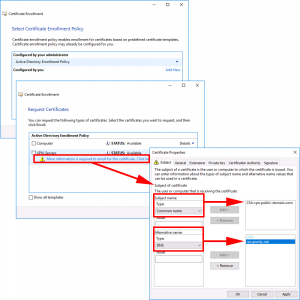
Next > Click the ‘More information…’ link > In the Subject Name Section, Set the Common name to the public DNS name of the RAS server. In the Alternative name section set the DNS value to the FQDN on the server (internally) > Apply > OK.
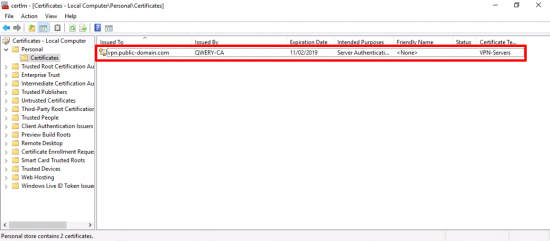
Enroll > Finish.

You now have a certificate based on the VPN-Server template.
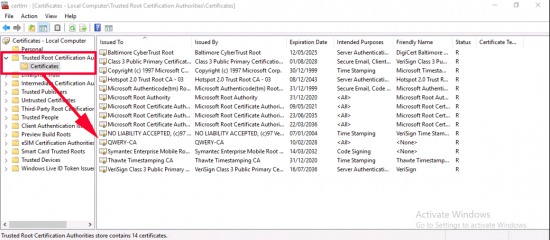
VPN-User Certificate: Just a quick note, on the Windows 10 client, run certlm.msc again but this time ensure you have your domain CA server certificate listed in the ‘Trusted Root Certification Authorities’ folder.
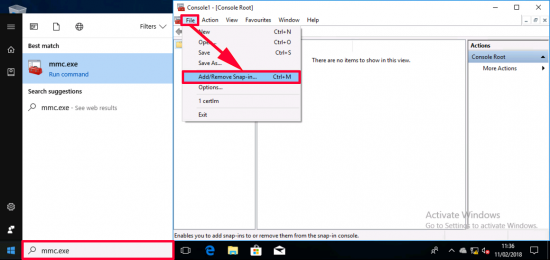
Now this console lists computer certificates, and we need to look at user certificates (I could just run certmgr.msc instead), but old habits die hard, so I’ll launch an mmc console > and add a snap-in.
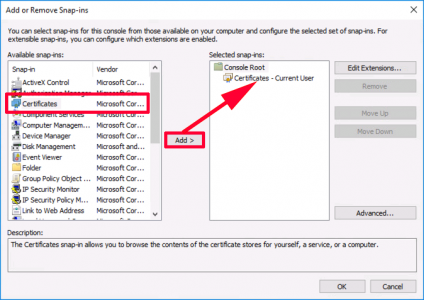
And add ‘certificates’ (Note: If I were an administrator I would be prompted to choose computer or user certificates, as I’m just a user, then current user is selected by default). > OK.
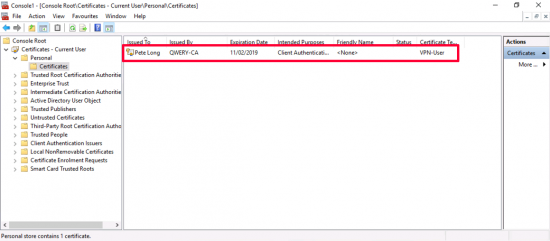
And there’s my certificate based on the VPN-User template.
If you’re struggling, and the user certificate refuses to appear, read my note (above) about e-mail addresses (that’s a very common error that causes auto-enrollment to fail). For troubleshooting look in the Event logs and in the ‘Failed Requests’ Section on your CA server. For all certificates, if something isn’t working then either somethings in the wrong group, the wrong group has been given permissions on the certificate template, or the GPO is linked to the wrong location.
That’s it for Part One, in Part Two I will look at deploying my RAS/VPN server into my DMZ, and having a rant/sneer at Microsofts continuing policy of trying to bypass my firewall.
Related Articles, References, Credits, or External Links
A massive thank you to Joseph Moody, and Kevin Kaminski, fellow MVP’s who took the time to reply to my Always On VPN queries.